After you have bought a new TP-Link router, you need to set it up so that you can use it properly. Setting up a TP-Link router involves much more than just plugging the router into a power outlet and connecting a cable. You need to configure the router properly and set it up so that it is optimized for devices using the network.
Before starting, make sure that your TP-Link router is powered on and it is connected to the modem through an Ethernet cable. If you have PPPoE or any other connection, you may require additional information, such as a username and password from your ISP. The features and menus can differ between models, but the basic process is the same.
Follow this guide to set up your new TP-Link Router –
- Power on the router and connect your PC or laptop to the router using an Ethernet cable.
- Once connected to the router, open a web browser and head over to 192.168.0.1 or www.tplinkwifi.net.

- You will be asked to set your admin login password by entering it twice. It is advisable that you set a strong password that you can easily remember. (Note: Admin login password and WiFi password are two different things, so you shouldn’t confuse one with the other)
- Click on Let’s Get Started/Login.
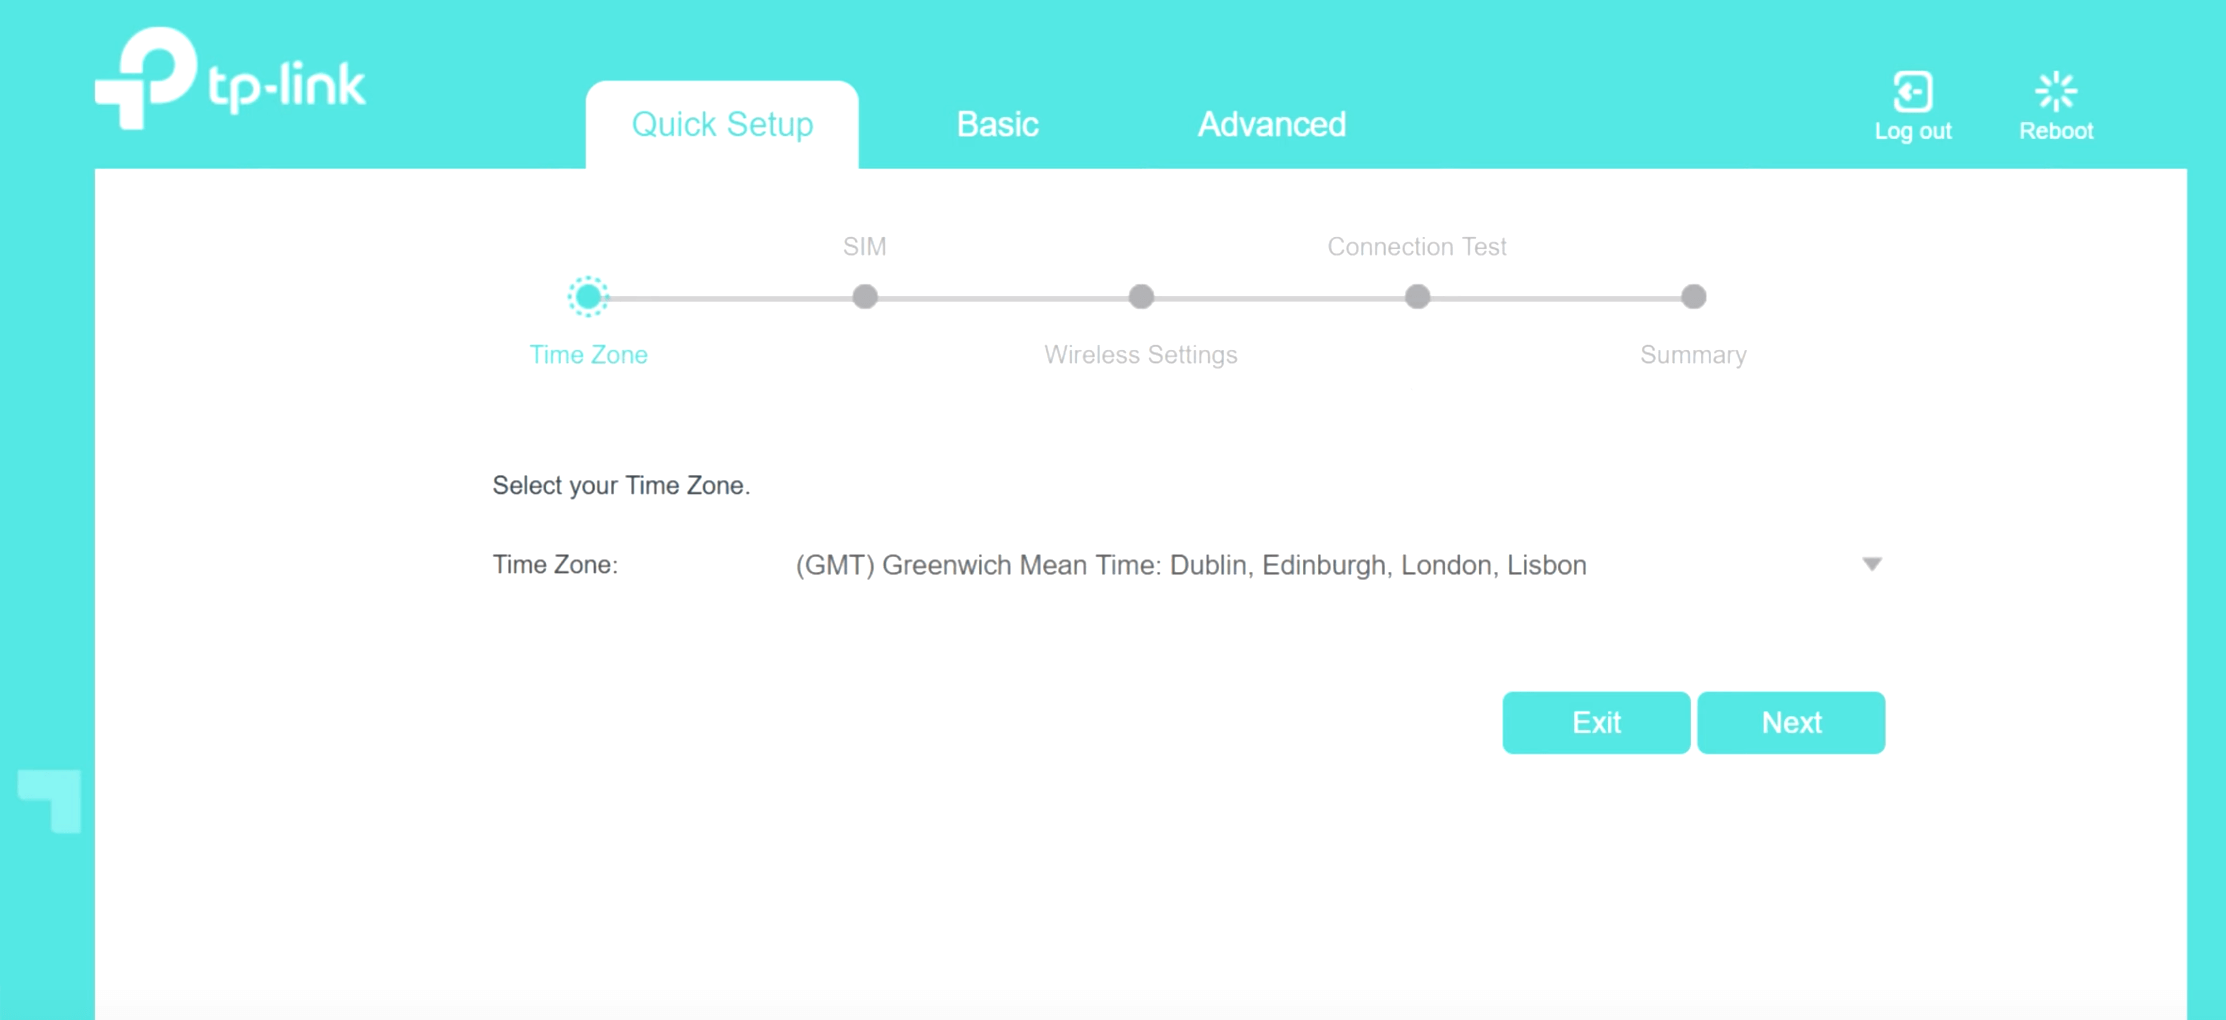
- Now, follow the on-screen instructions and configure your Internet and Wireless Network using the Quick Setup option.
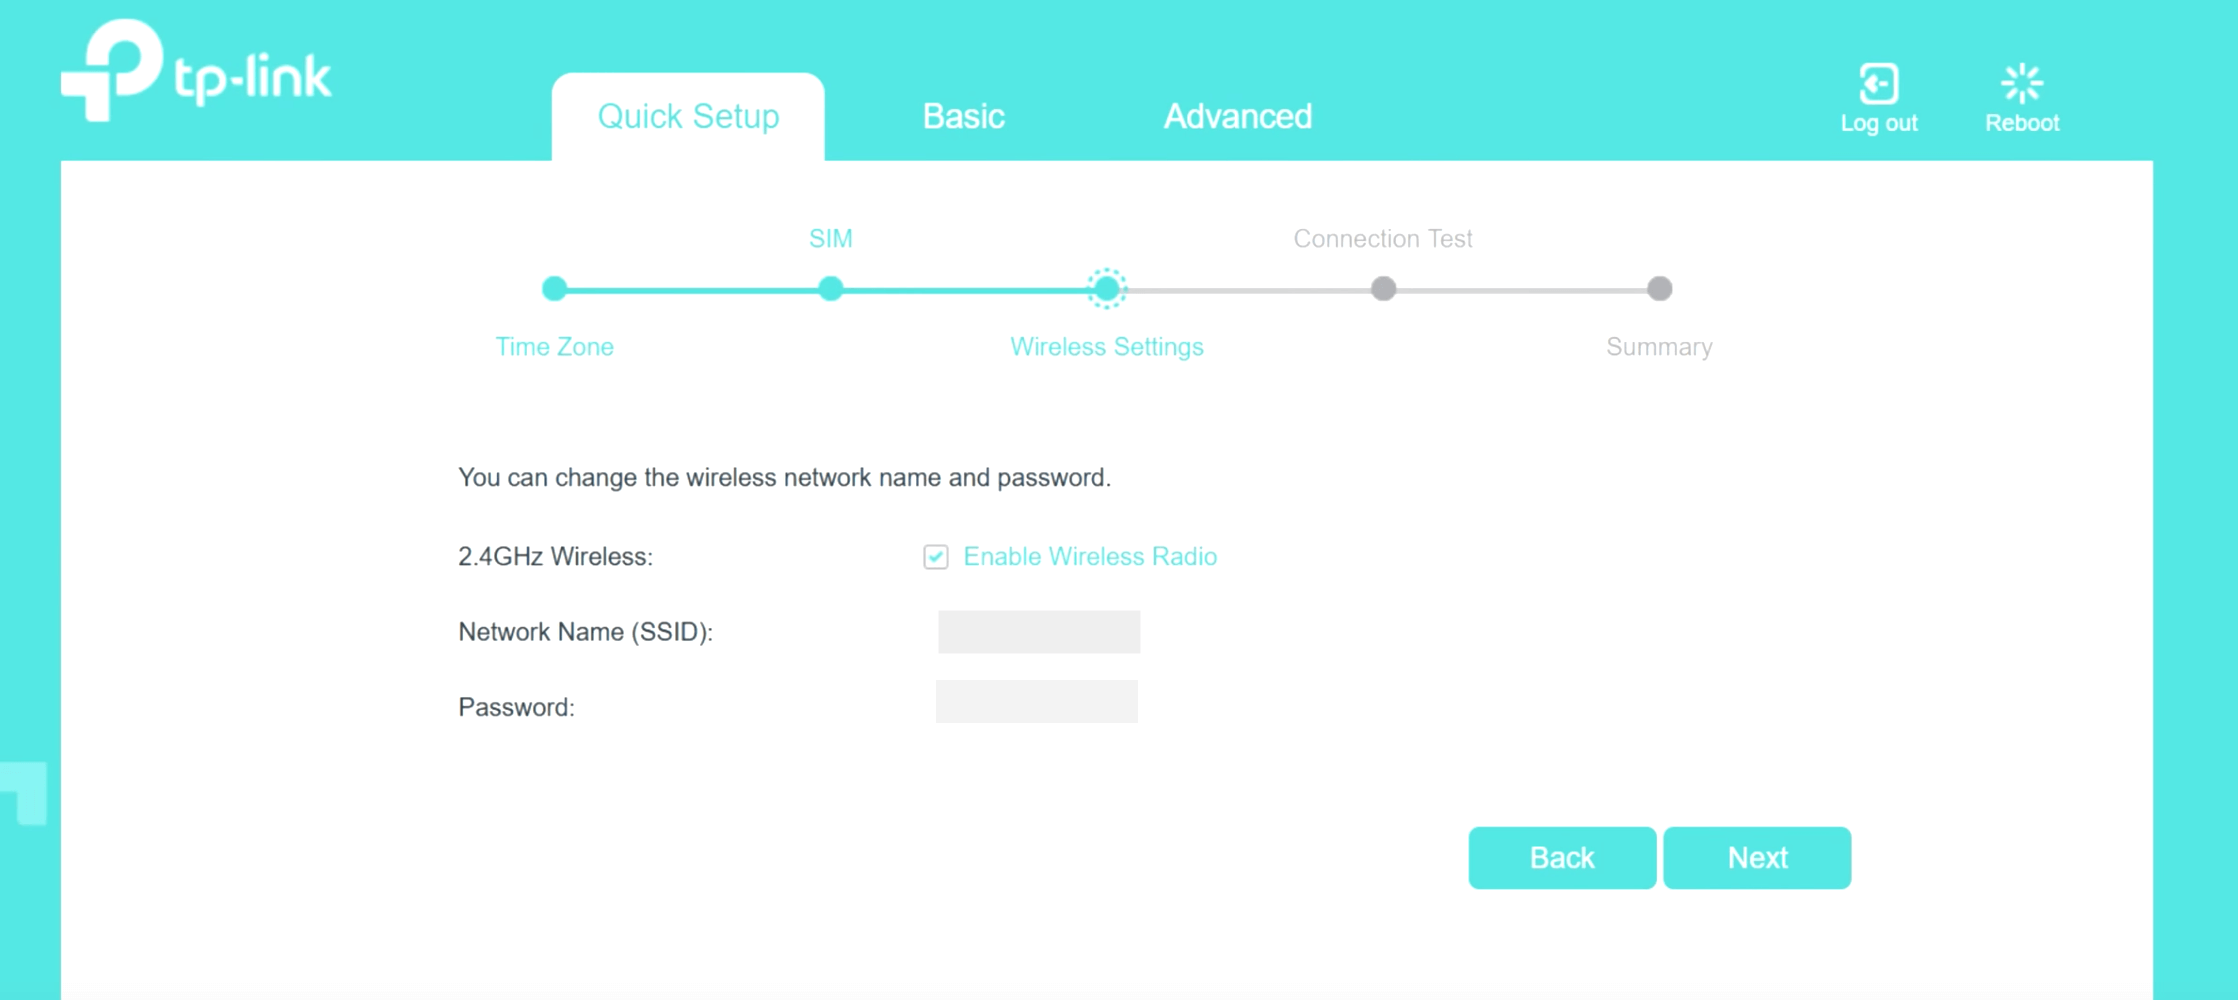
- You will be asked to set the network name and password for your WiFi network. Enter the name (SSID) for your Wireless Network in the given field and also set a password to secure your Wi-Fi network. Use a strong password and unique password that is difficult to guess. Avoid passwords based on names, birthdays, phone numbers, addresses, or simple numerical sequences.
- Once you are done, you can finish the process. After this, you will be able to join the WiFi network of your TP-Link router with the SSID and your password.
Common TP-Link Router Setup Problems
Cannot Access the Router Login Page
Entering the wrong gateway IP address is usually the reason you cannot access the router login page, so:
- Verify that your device is connected to the TP-Link router. For first-time setup, using an Ethernet connection is preferred.
- Check the actual default gateway address of the router by looking at a label printed on the back of the router or inside the documentation provided in the box, rather than assuming that a particular IP address is the default gateway address.
WiFi Works But There Is No Internet
If your device is connected to the WiFi network but the internet is not working, there might be several reasons:
- Check the Ethernet cable between the modem and the router’s WAN port. Then check the router’s WAN status and confirm that the selected connection type matches the ISP’s requirements.
- For PPPoE connections, verify the username and password.
- Make sure that you have an active internet connection and that there is no problem on the ISP’s end.
Certain Devices Cannot Connect
Sometimes, users face an issue where certain devices cannot connect to the WiFi network. In such cases:
- Make sure that you are entering the correct WiFi password
- Check whether your device supports the selected WiFi security mode and frequency band, as older devices may have problems with newer security standards or may support only 2.4 GHz.
- Also check whether MAC filtering, access controls, guest isolation, or other restrictions are preventing the connection.
How to Factory Reset a TP-Link Router
A factory reset can be useful if you have forgotten the administrator password, messed up the configuration of the router, are setting up a new internet connection, or preparing the router for another owner. However, keep in mind that a factory reset erases all settings and reverts everything to factory defaults.
So before resetting, make sure you have any required ISP information, particularly PPPoE credentials or static IP details, as after the reset, the TP-Link router will need to be configured again from the beginning.
Reset Using the Physical Button
The quickest way to factory reset your TP-Link router is by using the Physical Reset button. Here is how you can do it:
- At the back of your router, identify the reset button. Depending on your model, you may have a dedicated Reset button, a combined WPS/Reset button (pressing for less than five seconds activates WPS; pressing for 10 or more seconds triggers a reset), or a pinhole reset button requiring a pin or paperclip to press.
- Press and hold the button for more than 10 seconds. Release when the router’s light starts to blink.
- Now, wait for the router to reboot. The router will reboot and return to factory default settings.
Reset via the Web Interface
Alternatively, you can reboot your TP-Link router through the router’s admin panel. Here is how to do it:
- Log in to your router by heading over to tplinkwifi.net or 192.168.0.1.
- Once logged in, go to Advanced > System/System Tools > Backup and Restore.
- Click on Factory Restore and wait for the router to reboot.
- After reboot, the router will be reset to factory defaults, and all previously connected devices will be disconnected.