Setting up your NETGEAR router and configuring it is an easy task you can complete in just a few minutes. Once you properly set up the router, you can configure a wide variety of features that NETGEAR routers offer. Configuring the router the right way can create a reliable and high-performing home network.
The exact setup and configuration process varies between NETGEAR routers, as Nighthawk routers, gaming routers, standard wireless routers, and Orbi mesh systems can have different interfaces and capabilities. However, the basic setup process is the same, and many routers follow the same principles.
Before starting, you should identify your NETGEAR router model, as different models support different features, firmware versions, and wireless standards. Also, distinguish between a traditional NETGEAR router and an Orbi mesh system, as both work a little differently. You can follow this quick guide to easily set up your NETGEAR Router.
- Power on your NETGEAR router and connect it to your modem using an Ethernet cable.
- Connect your PC, Laptop, or Smartphone to the NETGEAR router using an Ethernet cable or WiFi network.
- Open a web browser on your device and head over to http://www.routerlogin.com or http://www.routerlogin.net.
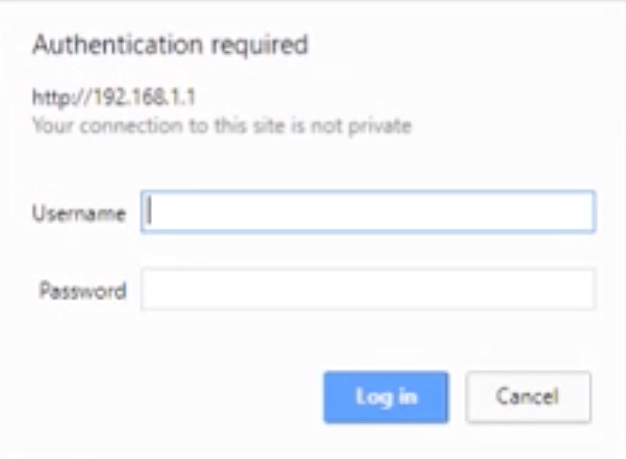
- A login page will appear, asking you to enter the admin username and password to proceed. Enter the default admin username and password. (The default username is admin and the default password is password.)
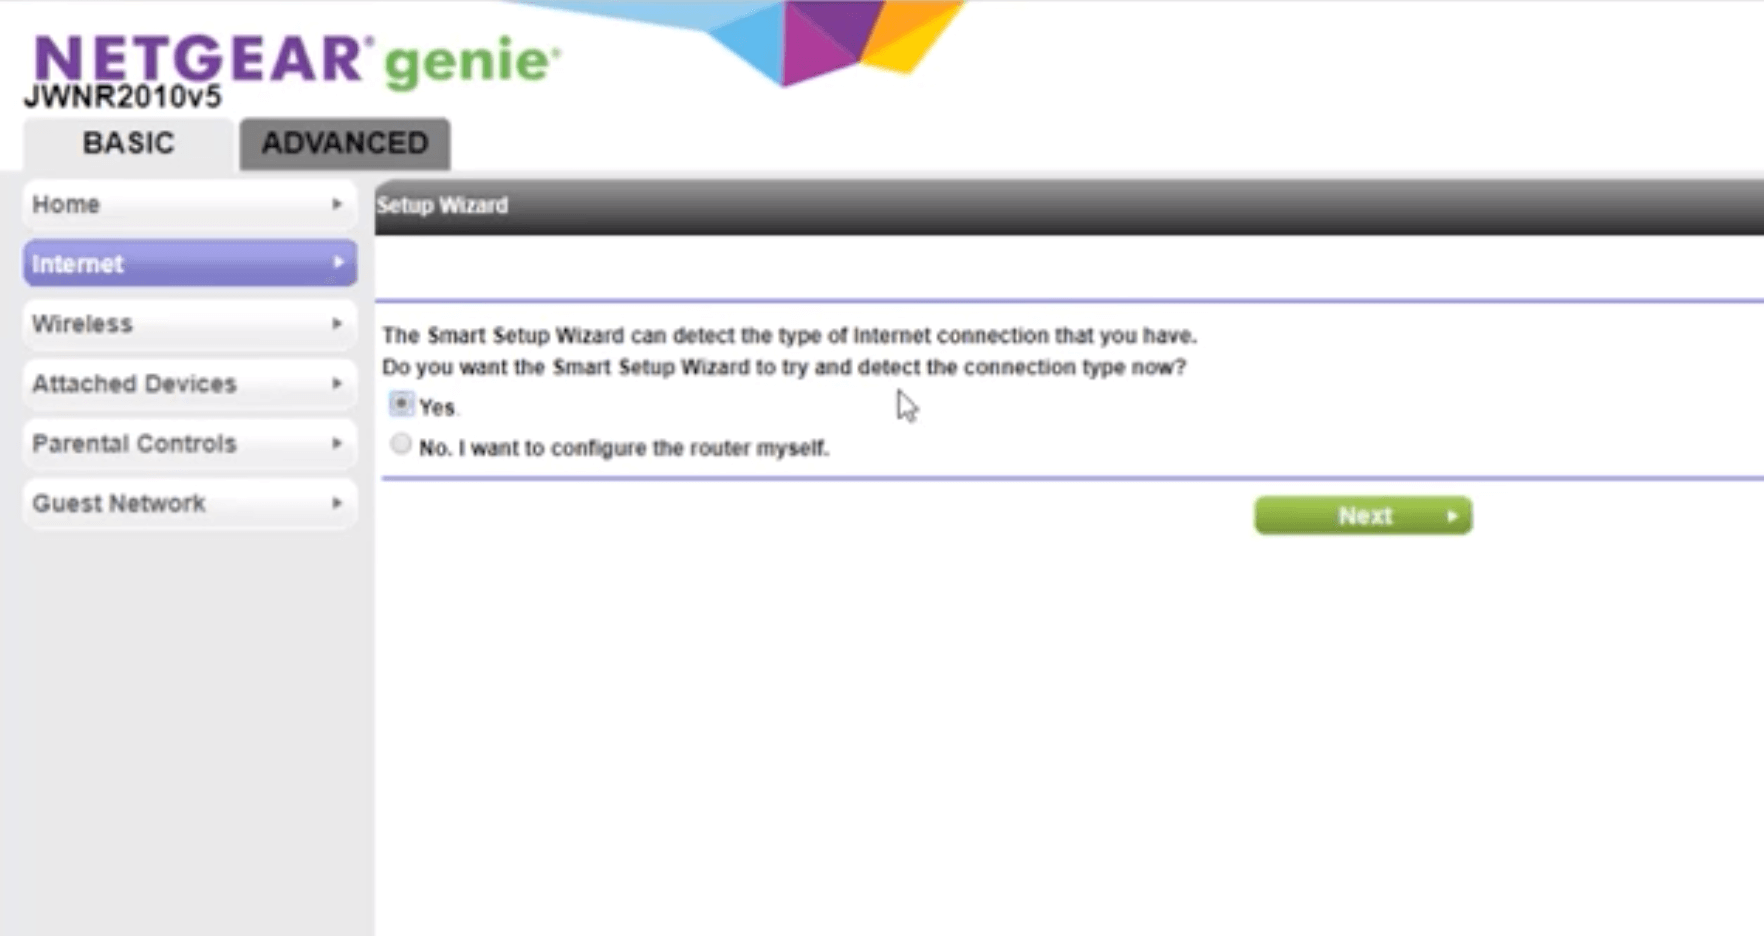
- Once logged in, go to Internet > Setup Wizard > New Connection and follow the NETGEAR Genie and on-screen instructions to set up your router.
- If “PPPoE DSL Internet Connection Detected” appears, enter the username and password provided by your ISP. If you don’t have it, you ask your ISP to provide the Username and Password for the connection.
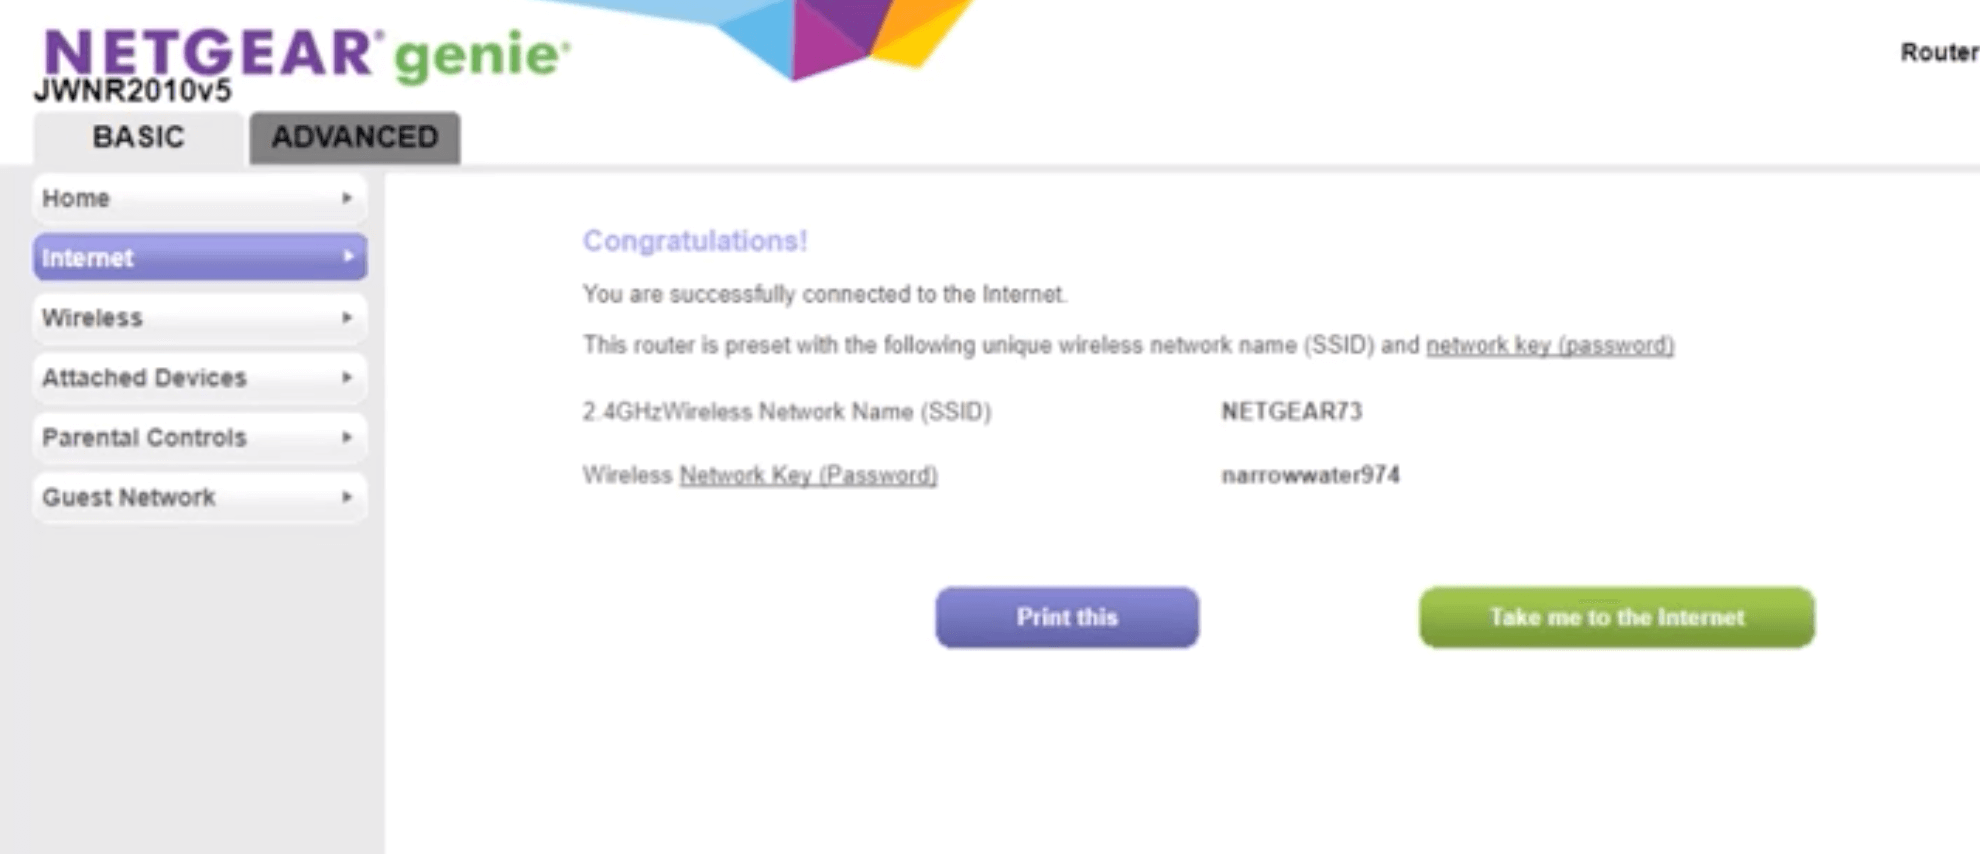
- Once your router is set up, the internet connection status will turn GOOD.
- Congratulations, you’re now all done setting up your NETGEAR Router.
Set Up a NETGEAR Router With the Nighthawk App
If you find it difficult to set up or configure the router through the web-based interface, you can use the NETGEAR Nighthawk mobile app to configure the router. Many modern NETGEAR routers can be configured through the Nighthawk app, which provides a guided setup process from a smartphone or tablet.
The process of setting up a NETGEAR router with the Nighthawk app is quite simple and easy. Once you connect your router to the internet source and power it on, connect your phone to the NETGEAR router’s initial wireless network. Open the Nighthawk app, log in, and follow the instructions to set up the router and configure the network.
The Nighthawk app simplifies tasks such as creating the WiFi network, establishing administrator credentials, and checking the router’s status. However, for advanced configuration and settings, users may be required to use the router’s web-based administration interface.
Create and Protect the Administrator Account
The router administrator account is very important, as it controls access to configuration settings and should be protected separately from the WiFi network by using a strong password. Some NETGEAR routers require the user to set an administrator password during initial setup, while others may have different default credential arrangements.
Whether you set up the admin account during or after the setup, you should always use a strong, unique administrator password that you can easily remember so that you don’t forget it. The administrator password and WiFi password are two different things, and both serve different purposes. Someone who knows the WiFi password should not automatically have access to the router’s administrative account.
Creating a WiFi Password
The WiFi password is an important credential that you should change or create after you set up your NETGEAR router. Creating a WiFi password should be among the first things that you do right after you set up your router so you don’t forget it and secure the network. Once the router setup is complete, you should head over to the Wireless Settings of the router and configure the network security.
Make sure that you create a strong WiFi password that you can easily remember, unlike the default WiFi password, which is strong but hard to remember. Avoid using numerical sequences, common names, birthdays, etc. For the encryption protocol, use WPA3, as it is the most secure encryption protocol available. If WPA3 is not available, prefer WPA2 and avoid using older and obsolete security protocols, as they might put your network at risk.