What Is MAC Address?

A MAC address is a unique identifier or address assigned to a network interface on a device. It helps devices to identify each other when they communicate over a local network, such as a home WiFi network or office network.

The term MAC stands for Media Access Control, and a MAC address is associated with a particular network interface and does not change, unlike an IP address, which can change depending on the network a device joins. For example, a laptop may have different IP addresses on different networks, but it will have one MAC address for its WiFi adapter on all networks.

A MAC address is usually a 48-bit address and is represented as six groups of two hexadecimal characters.

For example:

00:1A:2B:3C:4D:5E

It may also be written using hyphens:

00-1A-2B-3C-4D-5E

The hexadecimal system uses the numbers 0–9 and letters A–F. The first portion of a traditional MAC address may help identify the organization associated with the network hardware, while the remaining portion identifies the particular interface. MAC addresses play an important part in how Ethernet and WiFi networks deliver data to the correct device. Understanding what they are, how they work, and where they are used can also help when configuring a WiFi router or troubleshooting network connectivity.

What Is the Purpose of a MAC Address?

The main purpose of a MAC address is to provide a device’s network interface with a specific identifier on the local network. When devices are communicating on the same local network, the network equipment or router needs to determine where Ethernet frames should be delivered. For instance, you could have your laptop, smartphone, smart TV, and printer connected to the same router. The router or network uses MAC addresses to distinguish between these devices and to the correct destination device when forwarding local network traffic.

Remember that this communication through MAC addresses is different from communication across the internet, where IP addresses are used for routing between networks.

MAC Address vs IP Address

FeatureMAC AddressIP Address
Main roleIdentifies a network interface on a local networkIdentifies a device/interface at the network layer
OSI LayerLayer 2Layer 3
Usually associated withNetwork interfaceNetwork configuration
Can change?Yes (in special cases)Yes
Used for local frame deliveryYesNo
Assigned byManufacturer or operating system configurationRouter, DHCP server, ISP, administrator, etc.
Example00:1A:2B:3C:4D:5E192.168.1.1

Can a MAC Address Be Changed?

Yes, in some instances, a MAC address can sometimes be changed or overridden in software. This is commonly referred to as MAC spoofing when an interface is configured to present a different MAC address than its original one.

In other cases, a router or network interface may be configured to clone another MAC address. This is called MAC cloning, and it is usually done when internet service providers associate internet service with a particular device’s MAC address. If a customer replaces their router, MAC cloning could allow the new router to present the previously registered address and gain internet access.

MAC cloning and spoofing should only be performed on equipment and networks that you are legally authorized to configure. Changing a MAC address does not magically change the device’s internet connection speed, and it does not provide access to a WiFi network whose password you do not know.

How to Find Your MAC Address

The exact procedure varies, depending on the device and the operating system.

Windows

  1. Open Command Prompt and run the following command: ipconfig /all
  2. Look for Physical Address under the relevant network adapter.

macOS

  1. Go to System Settings > WiFi > Details.
  2. The MAC address may be listed as the WiFi address.

Android

  1. Go to Settings > About Phone > Status.
  2. Or look under the device’s WiFi/network settings.

The exact menu can vary between Android manufacturers.

iPhone

  1. Go to Settings > General > About.
  2. Look for the Wi-Fi Address.

What Is DNS?

DNS, or Domain Name System, is an online distributed naming system that translates domain names into IP addresses and provides relevant information associated with internet domains. Every time you open a website, use an online application, or perform an online activity, DNS is working in the background and translating domain names into numerical IP addresses.

Computers communicate using IP addresses, while people use domain names. DNS creates a connection between these two and allows people to use easy-to-remember domain names, e.g., example.com instead of a numerical IP address, by helping your device discover the IP address associated with that domain name.

For example:
Domain name: example.com
DNS lookup: Finds the relevant DNS record for the domain
IP address: Destination address provided by DNS

DNS is a fundamental part of the internet infrastructure and is a distributed and hierarchical system involving many DNS servers around the world, instead of a single server.

Why Do We Need DNS?

DNS is an important part of the internet infrastructure, and without DNS, using the internet would be less convenient, as you would have to remember an IP address for every website, email service, online store, application, and cloud service you use. Along with this, it would also become difficult for service providers to change their infrastructure without asking users to learn new addresses.

A DNS separates an online website’s or service’s human-readable name or domain name from the underlying network address. Plus, every time a website or service changes its servers or IP address, you don’t need to memorize anything new and can use the same domain name to access it.

For instance, a website can move its servers or change its IP address while continuing to use the same domain name. The website owner just has to update the relevant DNS records, and users can continue accessing the website by entering the same domain.
This makes DNS an important part of the internet infrastructure, as it provides not only convenience but also scalability and flexibility.

How Does DNS Work?

Many users wonder how DNS works and provides an IP address for the relevant domain name. Well, when you enter a domain name into your browser, several steps occur before the website begins loading, and DNS is an important part of it. Let’s take a look at how DNS works and how it provides the relevant DNS record for domains.

  1. When you enter a domain name into the address bar of a web browser, your device needs to determine the IP address associated with that domain name.
  2. The browser or operating system may already have a recent DNS result in its cache. If the cached information is still valid, the device may use it directly without performing a new lookup, and you can access the website.
  3. However, when cached information is not available, your device sends a DNS query to a recursive DNS resolver. This DNS resolver can be the one operated by your ISP, a public DNS provider, an organization, or another network service.
  4. The DNS resolver may already have the information because another user might have recently requested the information for the same domain. If the cached information is available, the DNS resolver returns the result immediately.
  5. If the information is not cached, the resolver can query the DNS hierarchy and ping the authoritative DNS server. The authoritative server ultimately provides the relevant DNS record for the domain.
  6. Once the DNS resolver receives the relevant DNS record for the domain, it returns the information to your device, and your browser can use that to access the IP address and communicate with the destination server.

The entire process is normally fast enough that users barely even notice it.

What Are Public DNS Servers?

A public DNS server or resolver is a DNS resolution service that users can configure instead of relying on the one that is supplied by their internet service provider (ISP). Users choose alternative public DNS servers for various reasons, including:

  • Reliability
  • Performance
  • Privacy policies
  • Security filtering
  • Content filtering

However, it should be noted that changing DNS does not automatically make an internet connection faster. A DNS resolver can potentially respond more quickly to DNS queries, but it cannot increase your connection’s bandwidth. If you have a 100 Mbps internet connection, changing DNS does not turn it into a 500 Mbps connection.

Examples of Public DNS Servers:

Cloudflare

Primary IPv4: 1.1.1.1

Secondary IPv4: 1.0.0.1

Best for: High speeds and strict privacy (does not log IP addresses).

Google Public DNS

Primary IPv4: 8.8.8.8

Secondary IPv4: 8.8.4.4

Best for: Massive global network reliability and fast lookup performance

Difference Between Static and Dynamic IP

Every device connected to a network needs an IP address so that data can be delivered to the correct destination. Whether you are browsing the internet, hosting a website, or managing a home network, an IP address plays an important role in how connections work. When discussing IP addresses, you will come across two terms: Static IP and Dynamic IP.

To put it simply, a Static IP, as the name suggests, stays assigned to a device or connection; it is permanent and does not change over time. While a Dynamic IP is assigned automatically and can change over time. However, the practical difference is that both go beyond whether an IP address changes over time or not.

Both Static and Dynamic IP addresses have different implications and uses in remote access, network management, hosting, security, cost, and reliability.

What is an IP address?

An IP address (Internet Protocol Address) is a numerical address that is used to identify a device on the network and enable communication over an IP network. For example, 192.168.0.1. There are two major versions of IP addresses currently in use:

  • IPv4, which uses addresses such as 192.168.1.1
  • IPv6, which uses longer hexadecimal addresses such as 2001:db8::1

An IP address can be assigned dynamically or configured statically to a device, depending on the network and its requirements.

What is a Static IP Address?

A static IP address is an IP address that remains consistently assigned to a device, network interface, or internet connection. It does not change periodically and stays the same. For instance, a business server might always be reachable at 203.1.101.25. This consistency in address is useful when other devices or users need to reliably connect to a server.

Static IP addresses can be used for both local networks and public internet connections.

What is a Dynamic IP Address?

A dynamic IP address is assigned automatically to a device or network interface by the network using a system such as DHCP (Dynamic Host Configuration Protocol).

Instead of manually specifying an address for every connected device, the DHCP server manages a list of available addresses and automatically assigns them to devices when they connect to the network

For example, your router might assign “192.168.1.25” to your laptop today, while the next time your laptop connects, it may be assigned “192.168.1.26” or any other address.

Dynamic addressing is extremely common because it makes network management much easier.

Difference Between Static and Dynamic IP

FeaturesStatic IPDynamic IP
Address consistencyUsually stays the sameCan change
AssignmentManual or reservedUsually automatic
ManagementRequires more planningEasier to manage
CostMay cost extra for public IPsUsually included with service
Remote accessEasierCan require additional solutions
HostingConvenientMore complicated
Network administrationMore predictableMore flexible
Typical home useLess commonVery common
Business useCommon for servers/servicesCommon for ordinary clients

A static IP address offers several benefits, especially for servers and services that need to be consistently reachable. It provides reliable remote access, easier server hosting, easier DNS configuration, and predictable network administration. However, it should be kept in mind that a dedicated or static public IP address costs more, requires more planning, and is easier to target.

On the other hand, a dynamic IP address simplifies network administration by automatically assigning IP addresses, has easier network management, usually requires no additional cost, and works well for typical home users. However, a dynamic IP address can change at any time, has a complicated process for remote access, and is not preferred when you need a consistent point of access.

Which IP Address Should You Choose?

For most home users, a dynamic public IP address is sufficient. If you mainly browse the internet, stream movies, play games, use social media, download files, and make video calls, you don’t need a static public IP address.

A static IP address becomes useful when you need to reliably provide or access a service from the internet. For businesses, remote-access systems, VPN servers, public-facing servers, and monitoring systems, a static public IP address is the most obvious choice.

Neither option is universally better than the other. The right choice depends on what you are trying to accomplish and your exact internet needs.

What Is an IP Address?

IP address, or Internet Protocol address, is a numerical address that is used to identify a device or network interface and help routers route data correctly across a network. Whenever a smartphone, laptop, computer, or any other device is connected to a network, it communicates with the network through an IP address.

IP addresses are fundamental to both local networks and the internet, as your home router assigns your devices a private IP address for local communication, while your internet service provider assigns your connection a public IP address for the internet.

How Many Types of IP Address Are There?

There are two major types or versions of IP addresses that are currently being used around the world: IPv4 and IPv6.

IPv4 Address

IPv4 uses a 32-bit address and is normally written as four decimal numbers separated by dots or periods. For example: 192.168.1.25

Each section is an octet and can contain any value from 0 to 255.

Since IPv4 has a finite address space, the growth and increasing number of internet-connected devices contributed to the development and deployment of IPv6.

IPv6 Addresses

IPv6 uses 128-bit addresses, providing a dramatically larger address space. An IPv6 address usually looks like: 2001:db8:85a3::8a2e:370:7334

IPv6 uses hexadecimal format, and several rules allow addresses to be shortened for readability. IPv6 can provide globally unique addresses to a much larger number of devices and includes features designed for modern IP networking.

Both IPv4 and IPv6 can operate on the same network through dual-stack configurations, where devices support IPv4 and IPv6 simultaneously.

What Is a Private IP Address?

A private IP address is an IP address that is used inside a local network rather than being directly routable across the public internet. Common examples of private IPv4 addresses include: 10.0.0.1 or 192.168.0.1

A private IP address is assigned to devices by the home network, and each device on the home network has a different IP address from others. With the help of private IP addresses, devices can communicate within the home network. Because private IPv4 addresses are not publicly routable, a router normally uses Network Address Translation (NAT) to allow multiple devices to share and use the same public IPv4 address when accessing the internet.

What Is a Public IP Address?

A public IP address is an IP address that is used for communication across the public internet. The public IP address is typically assigned to your connection by your internet service provider, and your router shares that public IP address among all the connected devices on your network. Example of a private IP address: 38.60.140.371

Devices on a network can have different private IP addresses, but their public IP address is the same. It is the job of your router to manage communication between that public-facing connection and the private devices connected to your home network.

How Does an IP Address Work?

When a device connects to a network, it needs an appropriate IP address and configuration before it can communicate over the network. On a typical network, the WiFi router’s DHCP server automatically assigns every connecting device an IP address along with other essential network information, such as the subnet mask, default gateway, and DNS servers.

Devices communicate over the network using data packets, and these packets contain source and destination IP information. Routers examine the destination IP address and use their routing tables to determine where the packets should go next. The router handles communication between your local network and the internet.

What Happens If Two Devices Have the Same IP Address?

When two devices are using the same IP address on a local network, it can create an IP address conflict, which can lead to intermittent connectivity, devices disconnecting, difficulty accessing network resources, and repeated connection failures

This conflict commonly arises when someone manually configures an IP address on the local network that falls inside the router’s DHCP pool or when the router’s DHCP settings are incorrectly configured. Using properly configured DHCP reservations can help prevent these conflicts.

How To Change WiFi Password?

Your WiFi password is considered the first line of defence for your home and office WiFi network against unauthorized connections. Anyone who knows your WiFi password can connect to the network, use your internet connection, access shared devices, or consume bandwidth. It is always recommended to change your WiFi password after you set up your router to improve your network and prevent anyone from accessing your network.

The exact process of changing the WiFi password varies between router brands and models, but to make it easier, we have discussed the basic procedure of changing the WiFi password for some of the reputable and famous WiFi brands. If you want to change the default router WiFi password, then follow this step-by-step guide.

TP-Link:

  1. Connect your device to the WiFi network you want to modify.
  2. Log in to the Router admin panel using its default IP Address: 192.168.0.1 / 192.168.1.1.
  3. Enter the default username and password (admin/admin in most cases).
  4. Navigate to Wireless > Wireless Security > WPA/WPA2 – Personal (Recommended) > Password.
  5. Enter your preferred password and Save the change.

D-Link:

  1. Connect your device to the WiFi network you want to modify.
  2. Open a web browser and log in to your router settings page via its default IP Address:  192.168.1.1 / 192.168.0.1.
  3. Input your username and password (or here’s a list of default usernames and passwords).
  4. Go to Wireless > Wireless Security > Security Mode set to WPA2 only > Pre-Shared Key: enter your preferred password.
  5. Apply the change > restart your WiFi, and the new password will be applied.

NETGEAR:

  1. Connect your device to the WiFi network you want to modify.
  2. Open your router setup page using its default IP address: 192.168.1.1 / 192.168.0.1 / http://routerlogin.com/.
  3. For authentication, enter the default username and password.
  4. Go to Wireless > Security Options > Select WPA2-PSK [AES] > Now enter your preferred password in Passphrase.
  5. Apply changes and reboot your WiFi for changes to take effect.

Keep in mind that the WiFi password and router administrator password are not necessarily the same thing. The WiFi password allows devices to join the WiFi network, while the administrator password allows you to change the router and network settings.

Tips for Creating a Strong WiFi Password

It is recommended that all users create a strong and secure WiFi password so that no one can guess it. While creating a new WiFi password, make the password long; since longer passwords are hard to guess or crack, make it unique, avoid using personal information such as your name, birthday, or phone number, and avoid obvious patterns like 12345678 or qwerty123.

A strong and secure WiFi password is a combination of both uppercase and lowercase letters along with special characters and does not follow any obvious patterns or use any personal information.

Along with creating a secure password, you should also choose the right WiFi security. Modern routers commonly support security standards such as WPA3 and WPA2. You should always prioritize WPA3 over other security standards. In case WPA3 is not available, you should choose WPA2. Anything below WPA2 is not considered secure because it no longer provides an appropriate level of protection for modern networks.

What If You Forgot Your WiFi Password?

If you forgot your WiFi password, there are several options to recover it:

Check the Router Label

If you are using the default WiFi password and forgot it, check the router label. Some routers have the default WiFi name and password printed on a label. However, if you previously changed the password, it won’t be valid anymore.

Check a Connected Device

Nowadays, most devices allow you to view the password for a WiFi network that the device has been previously connected to. Using your smartphone or laptop, connect to the network and go to settings to view the password.

Access the Router’s Admin Interface

If you can log into the router’s admin interface, you may be able to view or change the WiFi password directly from the WiFi settings section.

Reset the Router

A last-ditch method to recover the WiFi password is by performing a factory reset. Performing a factory reset will erase customized settings such as your WiFi name, password, ISP configuration, port forwarding rules, parental controls, and other network settings, but you will be able to connect to the network using the default WiFi password.

NETGEAR Router Setup

Setting up your NETGEAR router and configuring it is an easy task you can complete in just a few minutes. Once you properly set up the router, you can configure a wide variety of features that NETGEAR routers offer. Configuring the router the right way can create a reliable and high-performing home network.

The exact setup and configuration process varies between NETGEAR routers, as Nighthawk routers, gaming routers, standard wireless routers, and Orbi mesh systems can have different interfaces and capabilities. However, the basic setup process is the same, and many routers follow the same principles.

Before starting, you should identify your NETGEAR router model, as different models support different features, firmware versions, and wireless standards. Also, distinguish between a traditional NETGEAR router and an Orbi mesh system, as both work a little differently. You can follow this quick guide to easily set up your NETGEAR Router.

  1. Power on your NETGEAR router and connect it to your modem using an Ethernet cable.
  2. Connect your PC, Laptop, or Smartphone to the NETGEAR router using an Ethernet cable or WiFi network.
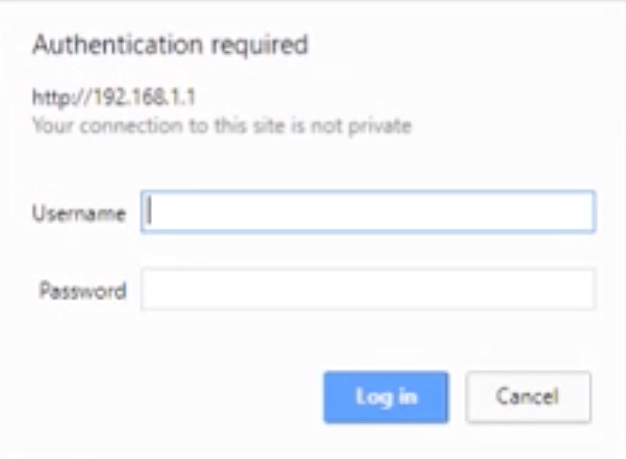
  3. Open a web browser on your device and head over to http://www.routerlogin.com or http://www.routerlogin.net.

  4. A login page will appear, asking you to enter the admin username and password to proceed. Enter the default admin username and password. (The default username is admin and the default password is password.)

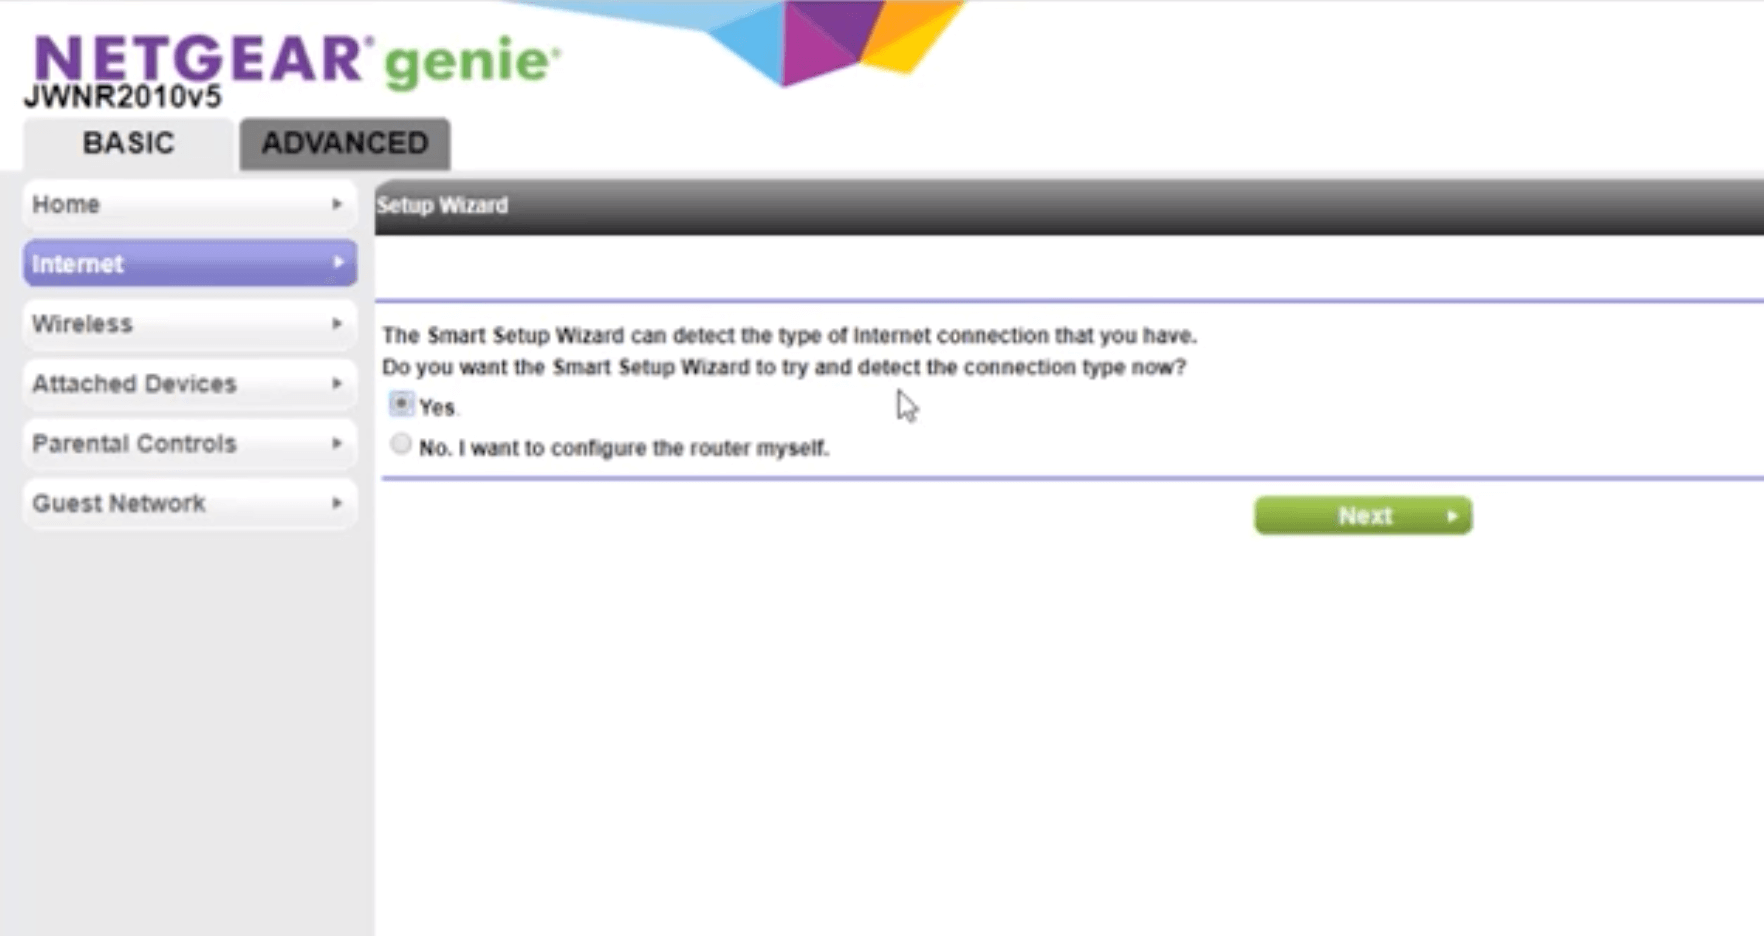
  5. Once logged in, go to Internet > Setup Wizard > New Connection and follow the NETGEAR Genie and on-screen instructions to set up your router.
  6. If “PPPoE DSL Internet Connection Detected” appears, enter the username and password provided by your ISP. If you don’t have it, you ask your ISP to provide the Username and Password for the connection.
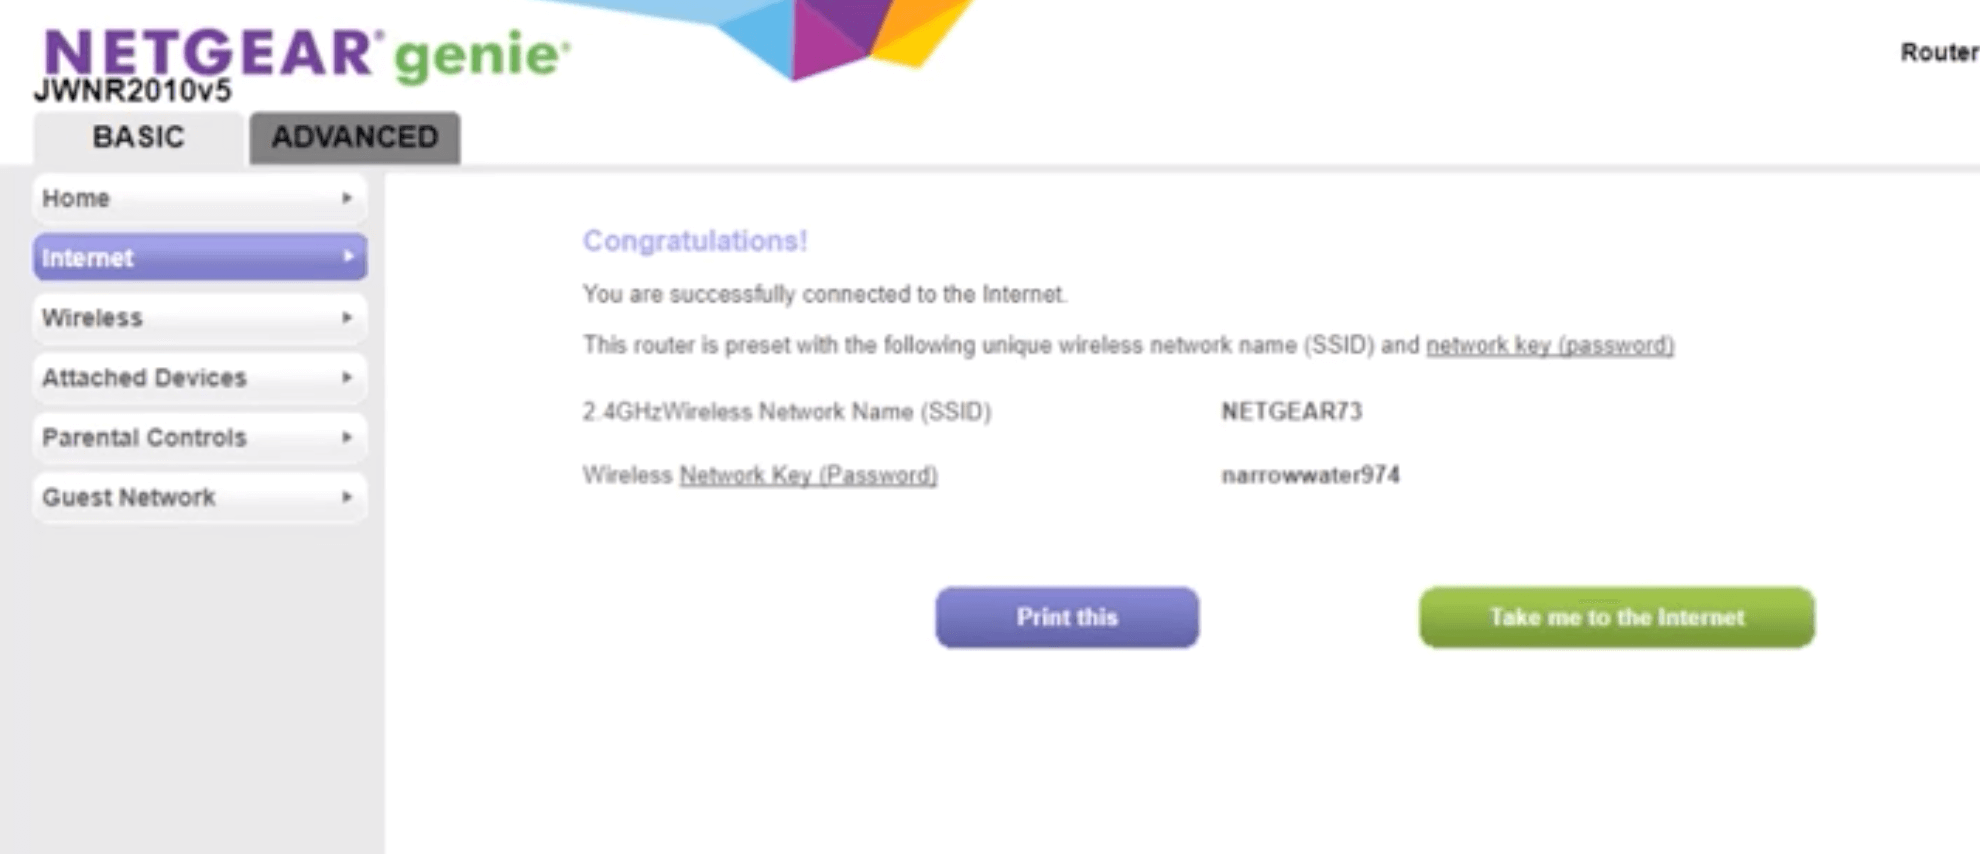
  7. Once your router is set up, the internet connection status will turn GOOD.
  8. Congratulations, you’re now all done setting up your NETGEAR Router.

Set Up a NETGEAR Router With the Nighthawk App

If you find it difficult to set up or configure the router through the web-based interface, you can use the NETGEAR Nighthawk mobile app to configure the router. Many modern NETGEAR routers can be configured through the Nighthawk app, which provides a guided setup process from a smartphone or tablet.

The process of setting up a NETGEAR router with the Nighthawk app is quite simple and easy. Once you connect your router to the internet source and power it on, connect your phone to the NETGEAR router’s initial wireless network. Open the Nighthawk app, log in, and follow the instructions to set up the router and configure the network.

The Nighthawk app simplifies tasks such as creating the WiFi network, establishing administrator credentials, and checking the router’s status. However, for advanced configuration and settings, users may be required to use the router’s web-based administration interface.

Create and Protect the Administrator Account

The router administrator account is very important, as it controls access to configuration settings and should be protected separately from the WiFi network by using a strong password. Some NETGEAR routers require the user to set an administrator password during initial setup, while others may have different default credential arrangements.

Whether you set up the admin account during or after the setup, you should always use a strong, unique administrator password that you can easily remember so that you don’t forget it. The administrator password and WiFi password are two different things, and both serve different purposes. Someone who knows the WiFi password should not automatically have access to the router’s administrative account.

Creating a WiFi Password

The WiFi password is an important credential that you should change or create after you set up your NETGEAR router. Creating a WiFi password should be among the first things that you do right after you set up your router so you don’t forget it and secure the network. Once the router setup is complete, you should head over to the Wireless Settings of the router and configure the network security.

Make sure that you create a strong WiFi password that you can easily remember, unlike the default WiFi password, which is strong but hard to remember. Avoid using numerical sequences, common names, birthdays, etc. For the encryption protocol, use WPA3, as it is the most secure encryption protocol available. If WPA3 is not available, prefer WPA2 and avoid using older and obsolete security protocols, as they might put your network at risk.

D-Link Router Setup

D-Link Router can be set up and configured in just a few minutes. Once you have set up your router and configured it, your WiFi connection will be up and running, and you will be able to connect to the internet through your D-Link Router.

To set up a D-Link router, you need to gather the router along with its power adapter, an Ethernet cable, and a device such as a laptop or smartphone. You also need an active internet connection, which can be from a modem, cable gateway, or Ethernet connection.

Some internet service providers require additional information. For instance, a PPPoE connection may require an ISP-provided username and password. Once you have all the details available, make sure that your D-Link router is connected to your modem with an Ethernet cable.

Now, follow these steps to set up your D-Link Router –

  1. Power on your D-Link Router.
  2. Connect your PC or Laptop to the router using an Ethernet Cable or WiFi throu.
  3. Once your device is connected, open a web browser and go to http://192.168.0.1 or http://192.168.1.1 (The default gateway address may vary from model to model; here is a list of default router IP address).
  4. A login page will appear. For most D-Link routers, the default username is admin, and the password field is to be left blank. Click on Log In. (You can find the default admin username and password for your router on a label printed on the device or supplied in documentation)
  5. Now, you can set up and configure your router using the Internet Connection Setup Wizard.
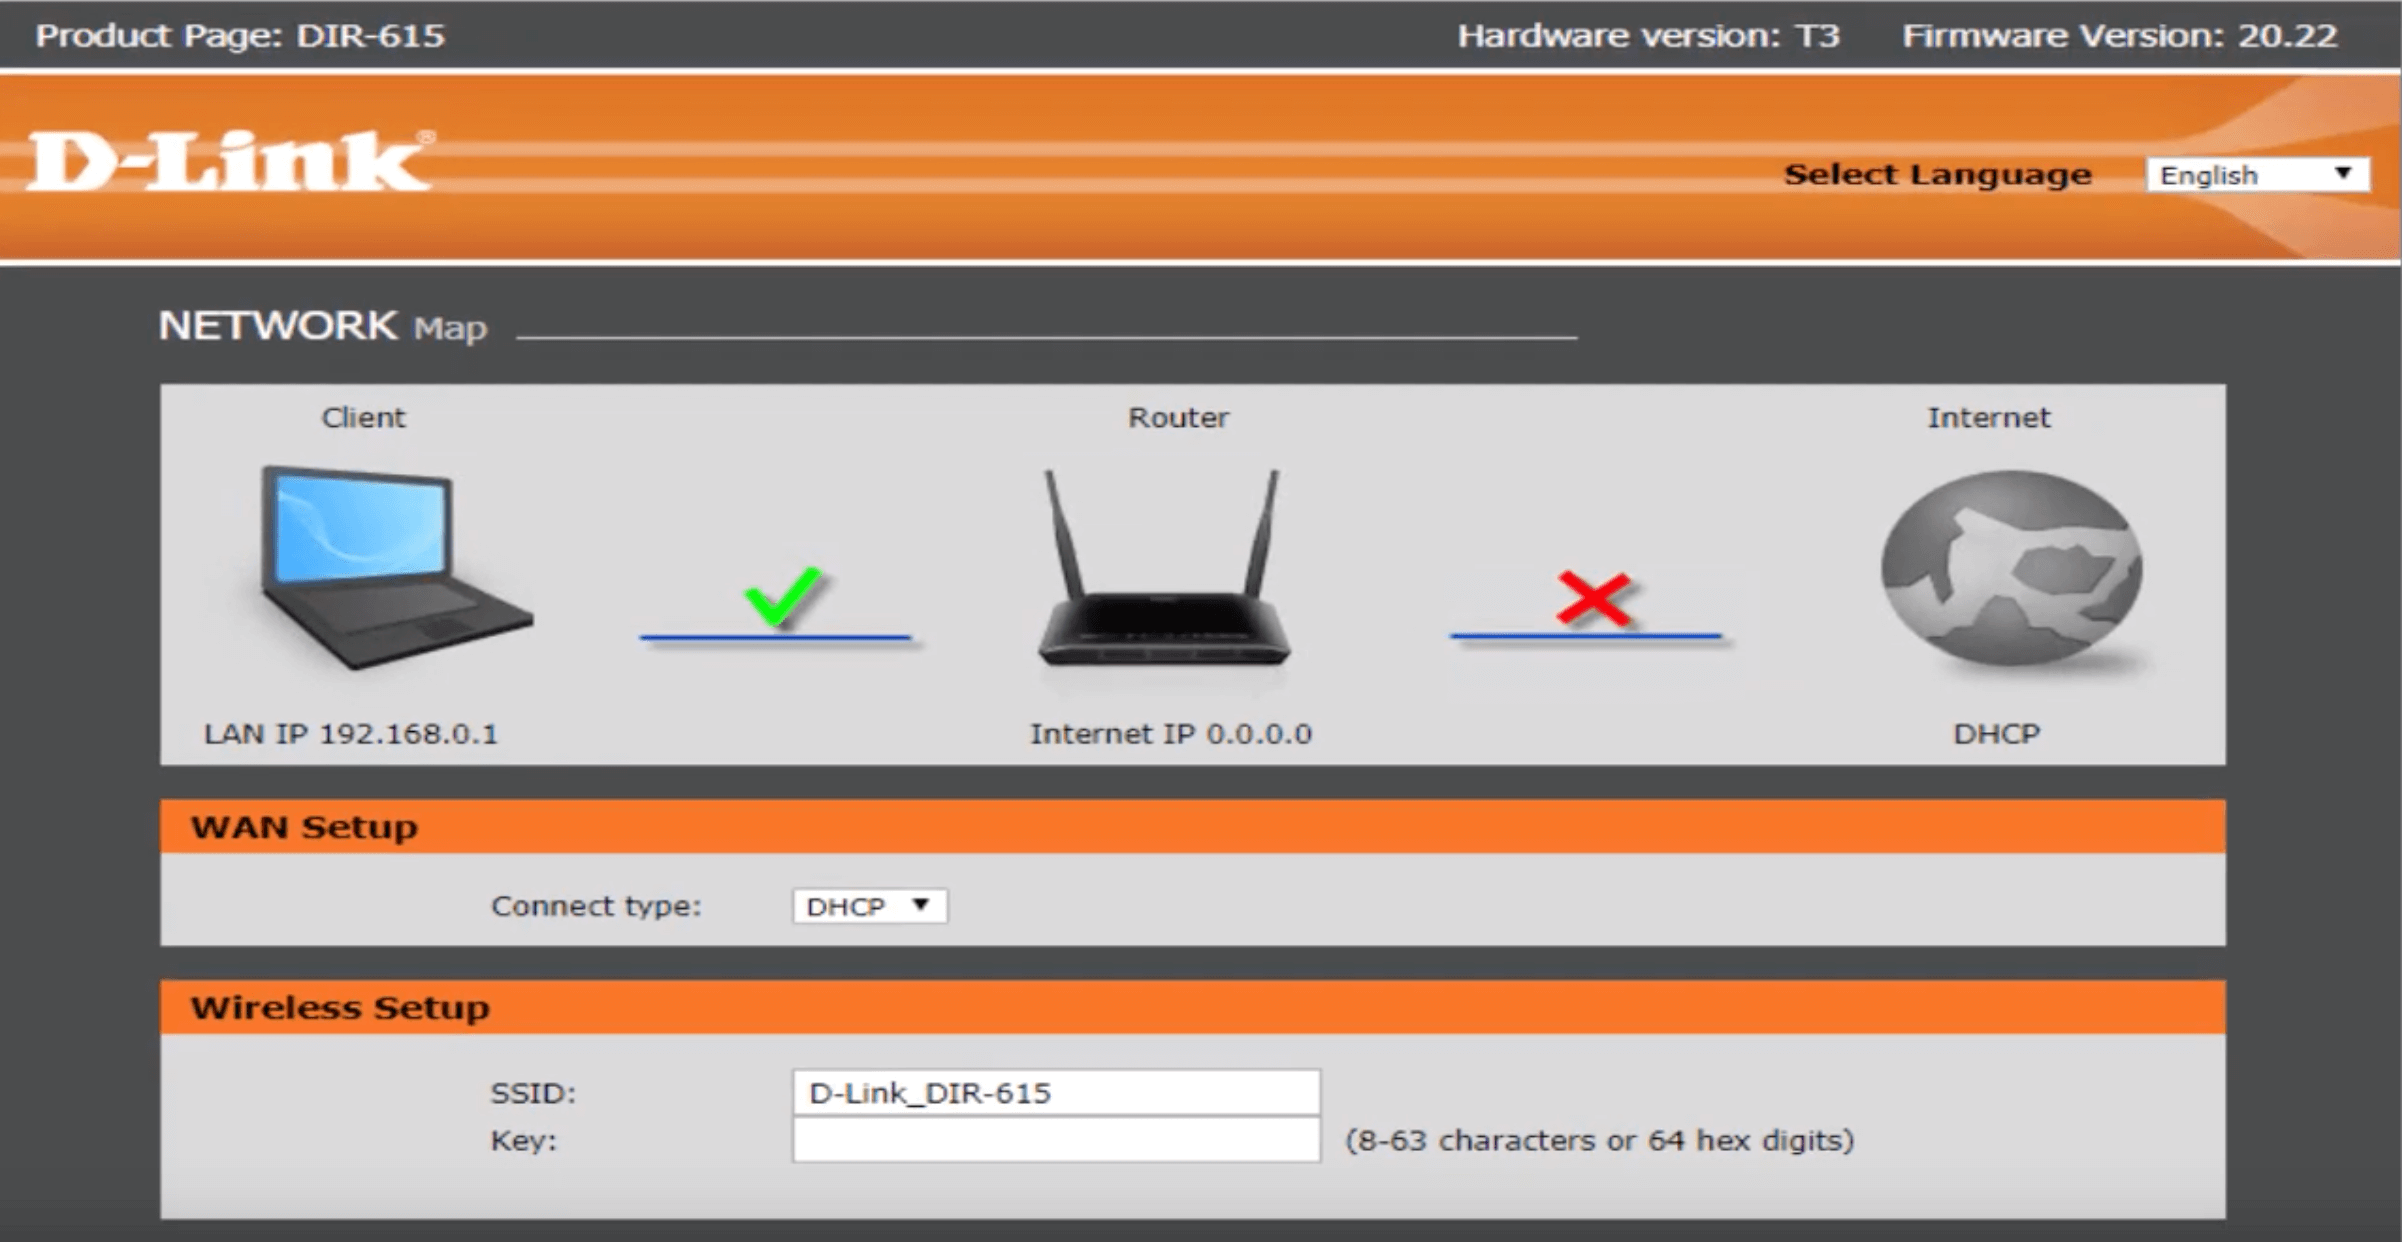
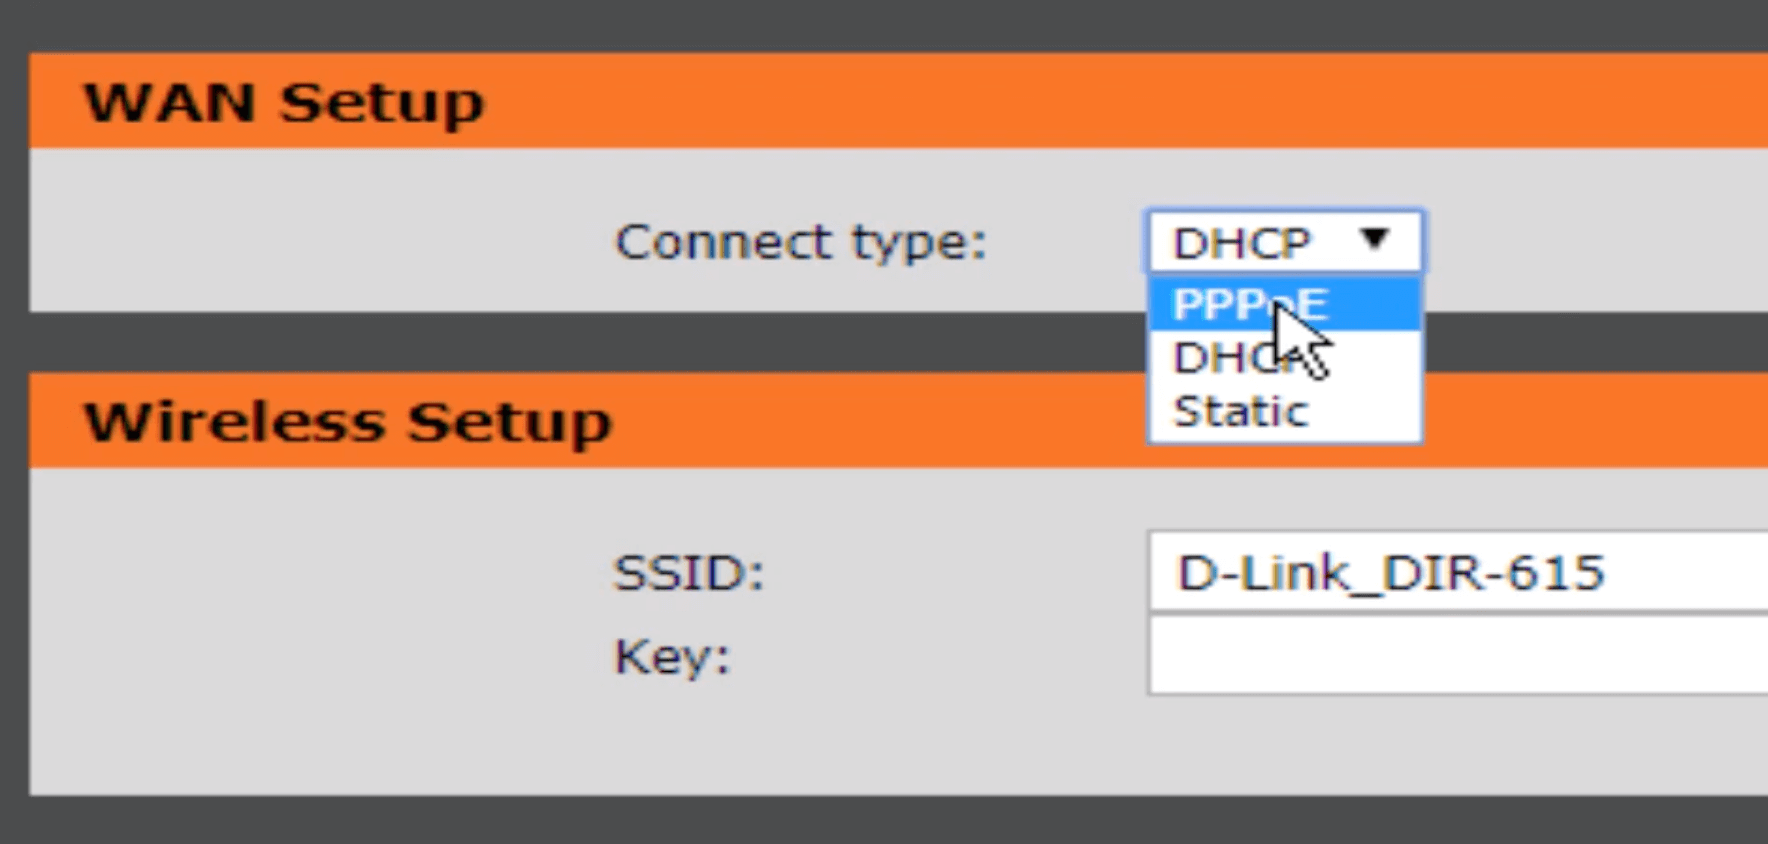
  6. Under Wireless Setup, enter the SSID (WiFi Name) and Key (Password).
  7. Under WAN Setup, choose Connect type: DHCP/PPPoE/Static (You can ask your ISP about your internet connection and the required details).
  8. After you have configured your internet connection, you can then click on Save and Connect, and the router will now connect to the Internet.
  9. You can then visit the Wireless Settings and set up your Wi-Fi network, including its SSID and password.

Configure D-Link Router Security

Security should be part of the initial D-Link router setup rather than something that you can configure later. As soon as you set up the router, or during the setup, you should change the administrator credentials. Changing admin credentials is necessary, as not doing so can allow anyone on the network to access the network settings. The router administrator password is different from the WiFi password, and both should be treated as separate credentials.

Next, create a strong WiFi password for the network in the Wireless section (If you haven’t done it already during the router setup process). Use a sufficiently long and unique password that you can easily remember rather than a simple word, phone number, or easily guessed sequence.

For WiFi security, use WPA3 when supported by both the router and your devices. If WPA3 is unavailable on the router or is not compatible with your devices, use WPA2-AES instead of any outdated wireless security standards.

Also review remote administration settings and disable them if not necessary, as router management should generally not be unnecessarily exposed to the public internet. Keep the router’s firmware updated and use the built-in firewall where available to avoid unnecessary issues.

Configure 2.4 GHz and 5 GHz WiFi

Many D-Link routers these days come with dual-frequency bands and support both 2.4 GHz and 5 GHz WiFi.

The 2.4 GHz WiFi band generally provides better range and can work better through objects and walls, but since it is the most common frequency band, it is more susceptible to congestion and interference.

The 5 GHz WiFi band generally offers higher speeds and has more available channels, but its effective range is often shorter, meaning that it has less range than the 2.4 GHz band. Some newer D-Link routers come with an additional frequency band and support the 6 GHz band as well.

For devices that perform high-bandwidth activity, such as computers, modern smartphones, and gaming systems, using the 5 GHz band is the obvious choice when they are reasonably close to the router. For older or smart-home devices, and devices away from the router, the 2.4 GHz band may work well.

You can configure and enable the 2.4 GHz and 5 GHz WiFi settings on your D-Link router by logging into the admin interface via 192.168.0.1 or 192.168.1.1 and heading over to Settings > Wireless (or Setup > Wireless Settings on older models).

TP-Link Router Setup

After you have bought a new TP-Link router, you need to set it up so that you can use it properly. Setting up a TP-Link router involves much more than just plugging the router into a power outlet and connecting a cable. You need to configure the router properly and set it up so that it is optimized for devices using the network.

Before starting, make sure that your TP-Link router is powered on and it is connected to the modem through an Ethernet cable. If you have PPPoE or any other connection, you may require additional information, such as a username and password from your ISP. The features and menus can differ between models, but the basic process is the same.

Follow this guide to set up your new TP-Link Router –

  1. Power on the router and connect your PC or laptop to the router using an Ethernet cable.
  2. Once connected to the router, open a web browser and head over to 192.168.0.1 or www.tplinkwifi.net.

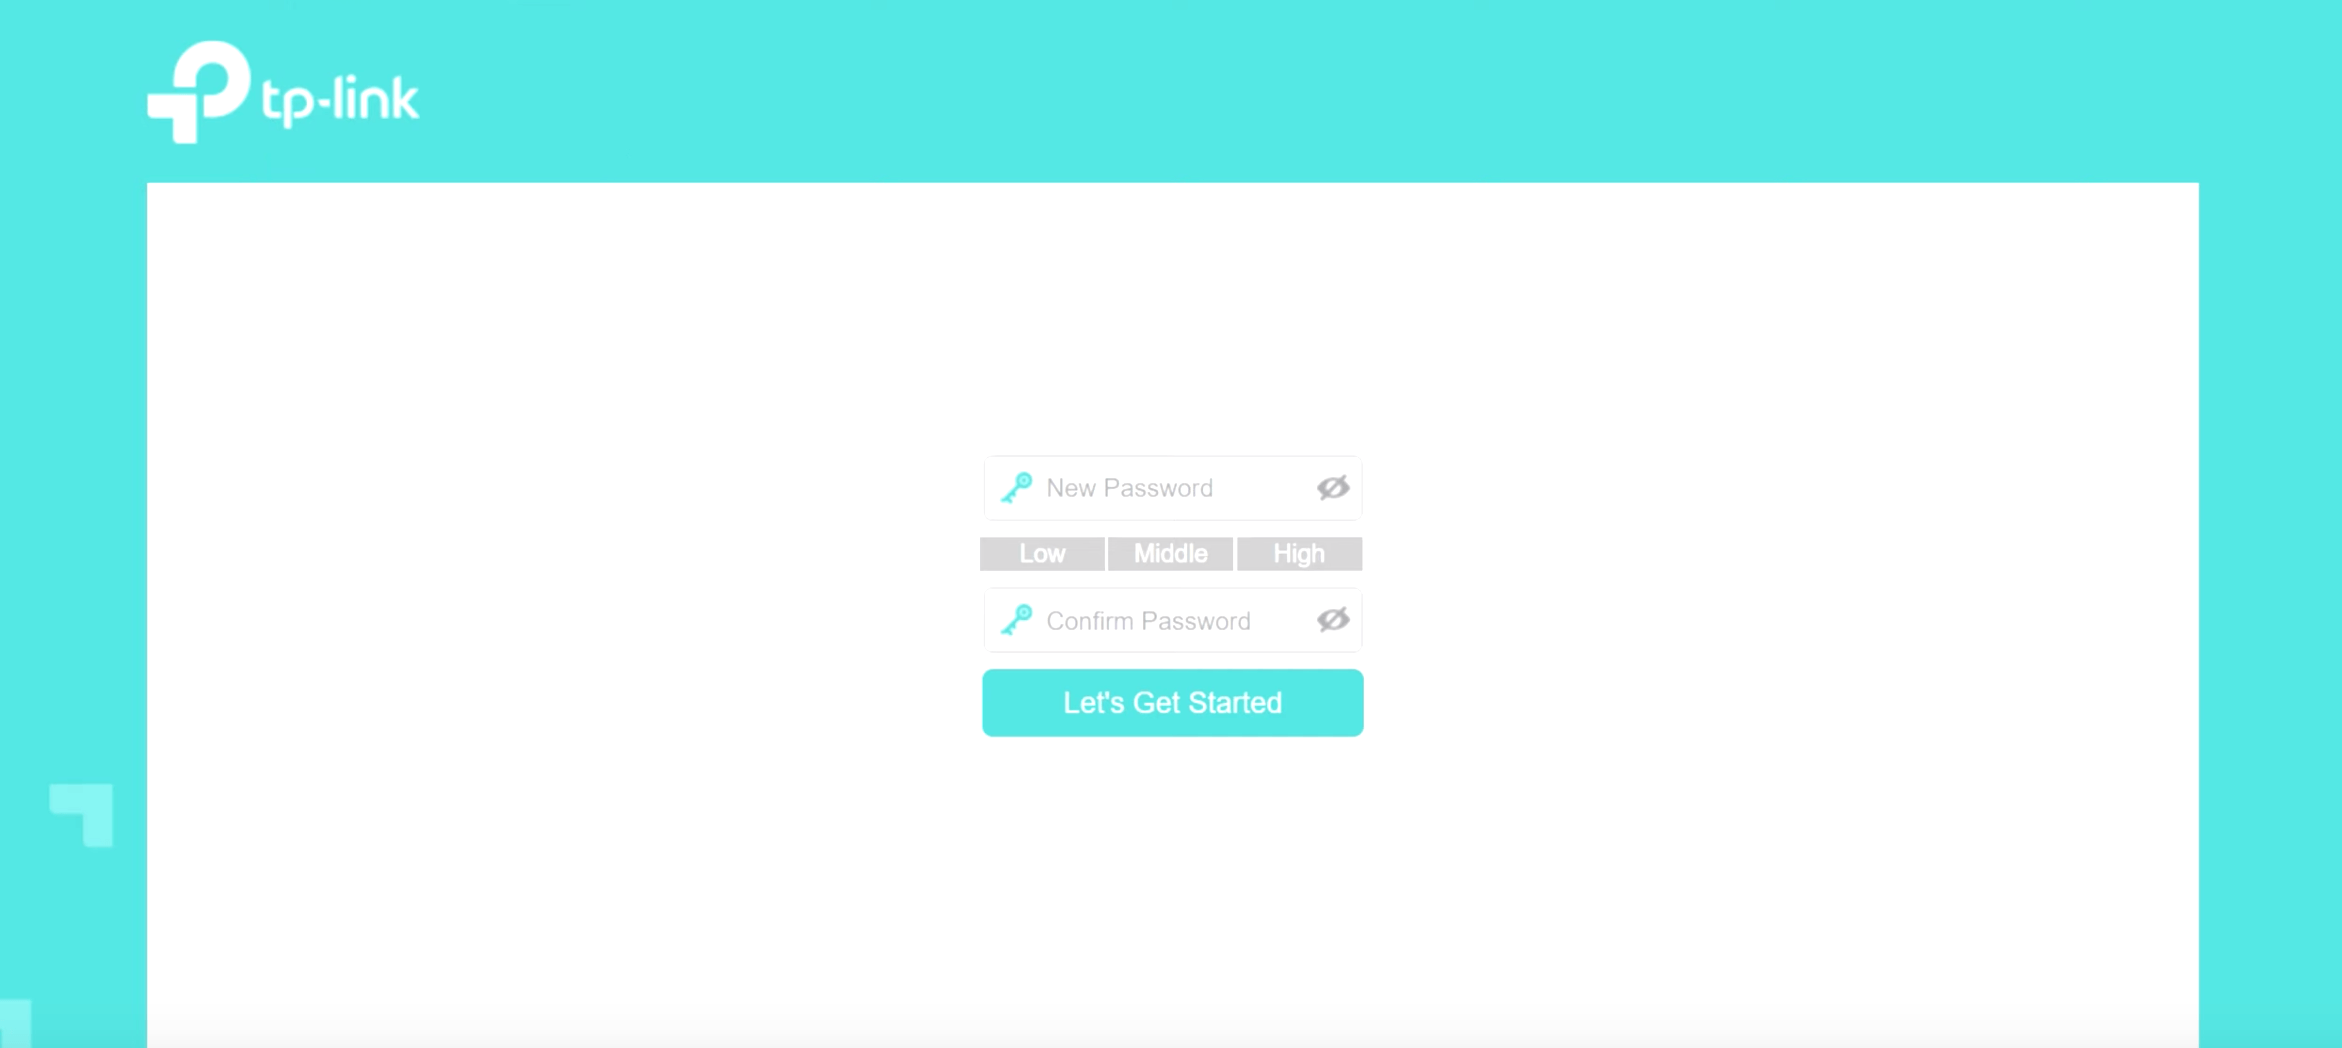
  3. You will be asked to set your admin login password by entering it twice. It is advisable that you set a strong password that you can easily remember. (Note: Admin login password and WiFi password are two different things, so you shouldn’t confuse one with the other)
  4. Click on Let’s Get Started/Login.

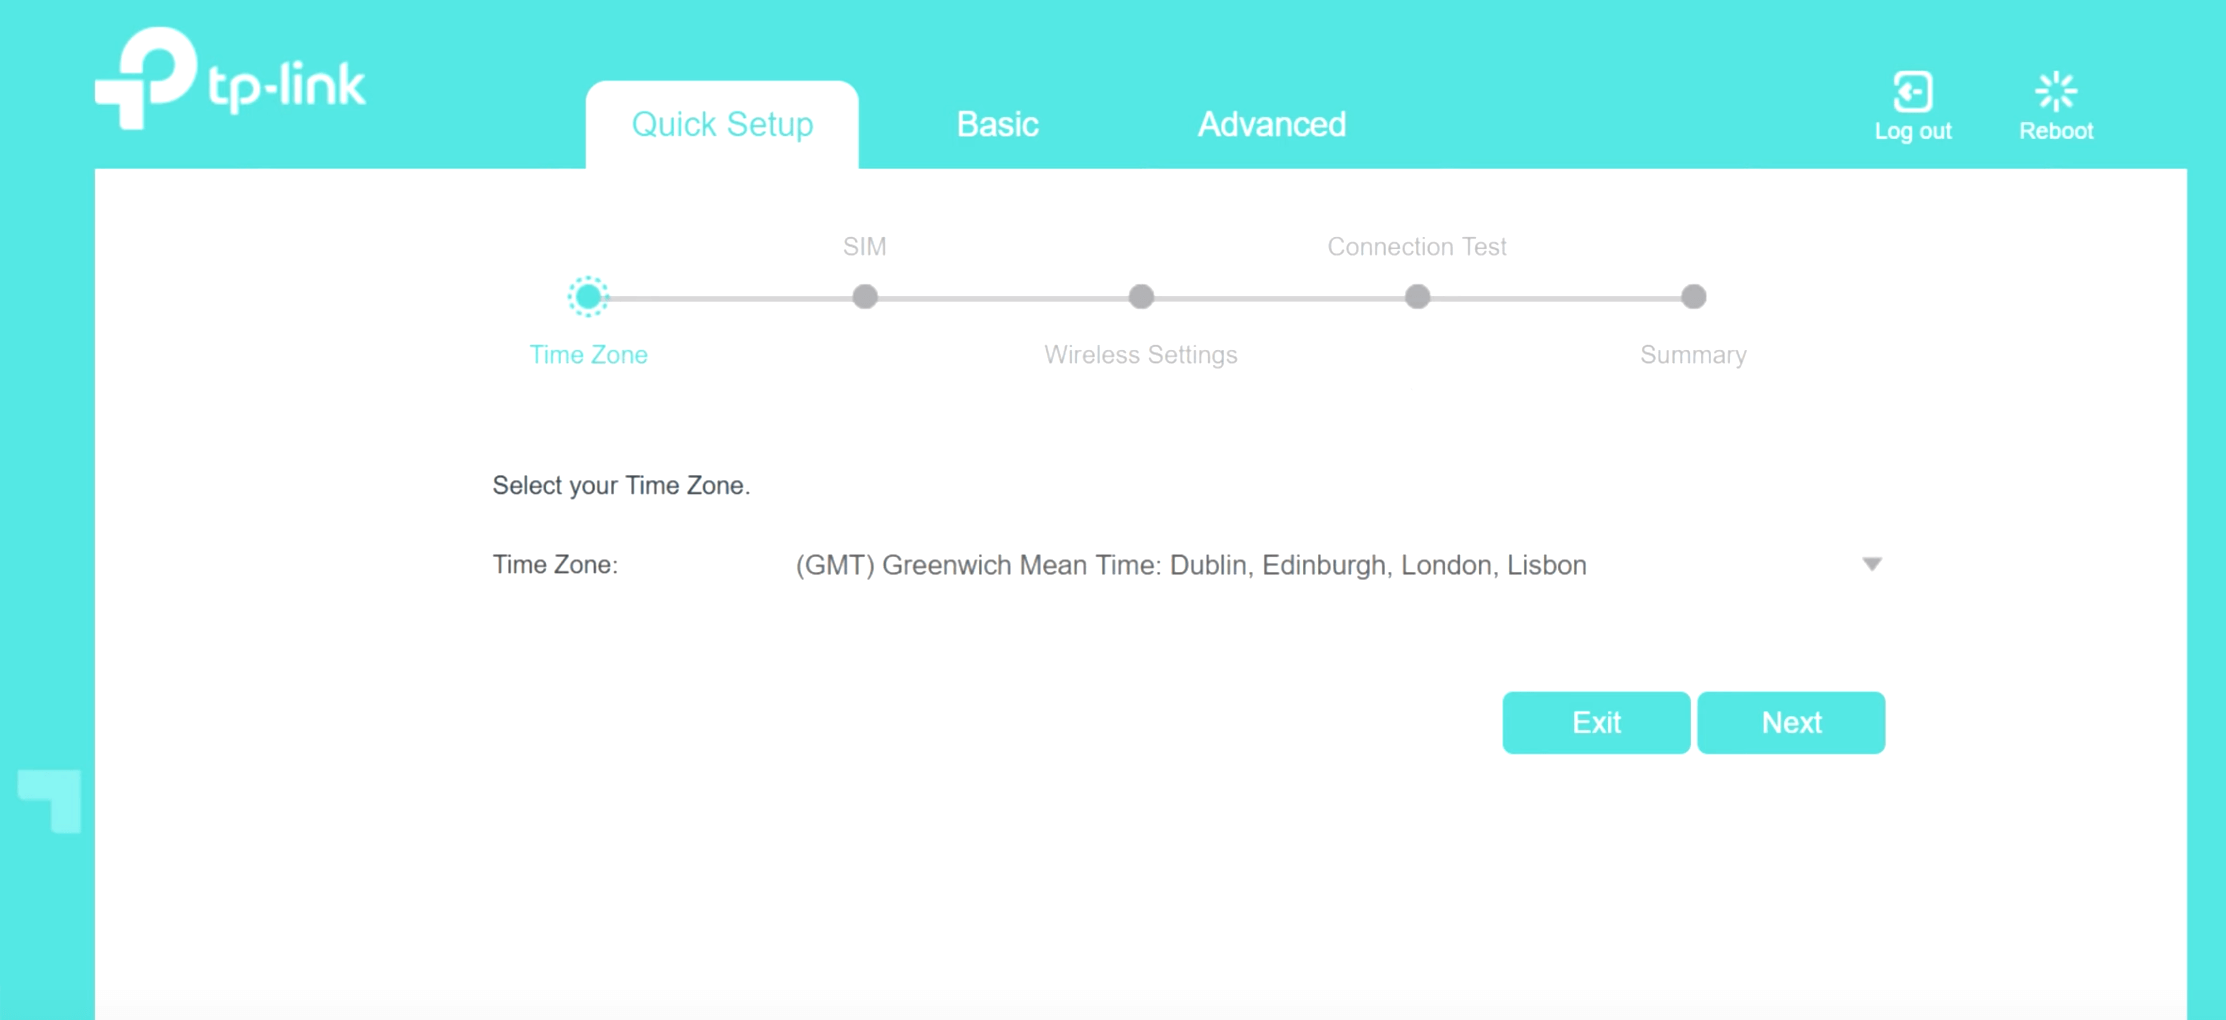
  5. Now, follow the on-screen instructions and configure your Internet and Wireless Network using the Quick Setup option.
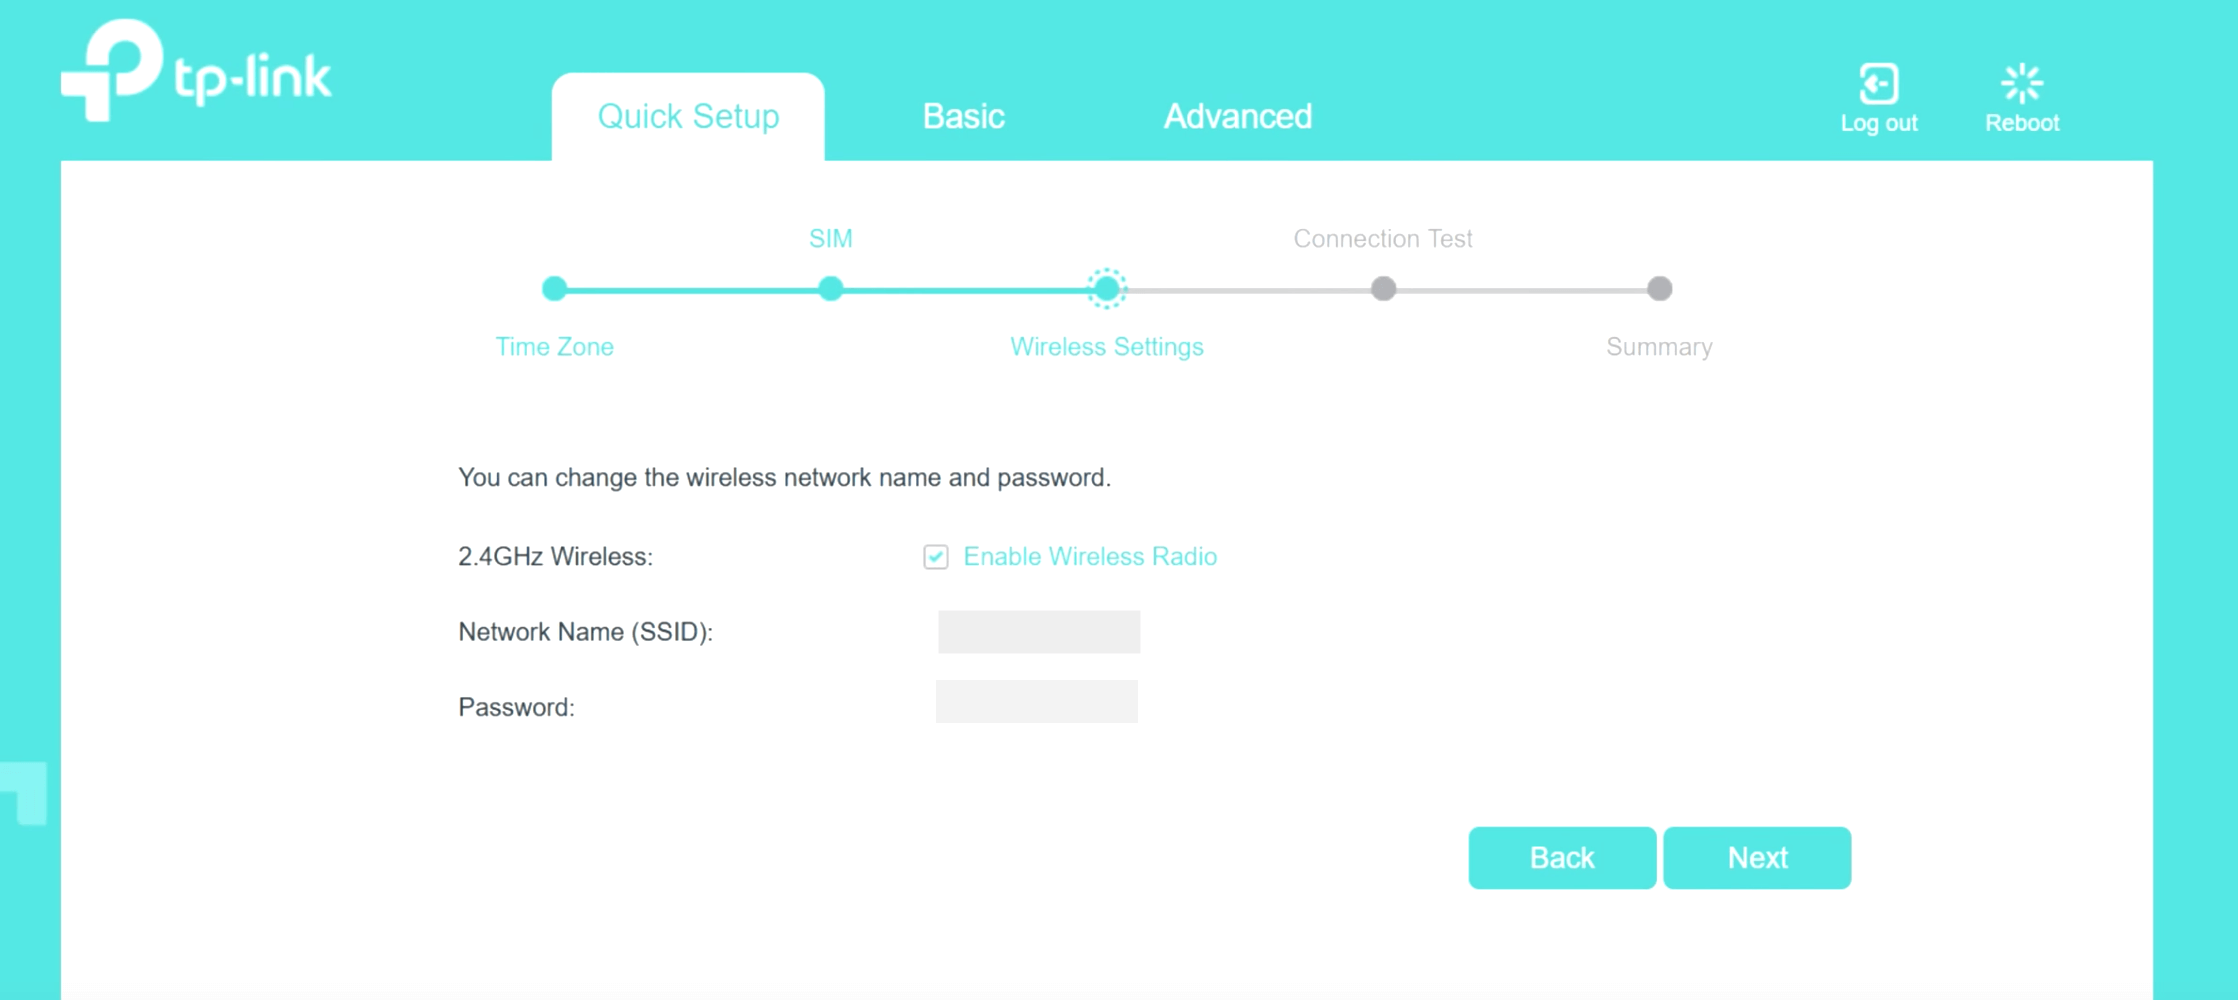
  6. You will be asked to set the network name and password for your WiFi network. Enter the name (SSID) for your Wireless Network in the given field and also set a password to secure your Wi-Fi network. Use a strong password and unique password that is difficult to guess. Avoid passwords based on names, birthdays, phone numbers, addresses, or simple numerical sequences.
  7. Once you are done, you can finish the process. After this, you will be able to join the WiFi network of your TP-Link router with the SSID and your password.

Common TP-Link Router Setup Problems

Cannot Access the Router Login Page

Entering the wrong gateway IP address is usually the reason you cannot access the router login page, so:

  • Verify that your device is connected to the TP-Link router. For first-time setup, using an Ethernet connection is preferred.
  • Check the actual default gateway address of the router by looking at a label printed on the back of the router or inside the documentation provided in the box, rather than assuming that a particular IP address is the default gateway address.

WiFi Works But There Is No Internet

If your device is connected to the WiFi network but the internet is not working, there might be several reasons:

  • Check the Ethernet cable between the modem and the router’s WAN port. Then check the router’s WAN status and confirm that the selected connection type matches the ISP’s requirements.
  • For PPPoE connections, verify the username and password.
  • Make sure that you have an active internet connection and that there is no problem on the ISP’s end.

Certain Devices Cannot Connect

Sometimes, users face an issue where certain devices cannot connect to the WiFi network. In such cases:

  • Make sure that you are entering the correct WiFi password
  • Check whether your device supports the selected WiFi security mode and frequency band, as older devices may have problems with newer security standards or may support only 2.4 GHz.
  • Also check whether MAC filtering, access controls, guest isolation, or other restrictions are preventing the connection.

How to Factory Reset a TP-Link Router

A factory reset can be useful if you have forgotten the administrator password, messed up the configuration of the router, are setting up a new internet connection, or preparing the router for another owner. However, keep in mind that a factory reset erases all settings and reverts everything to factory defaults.

So before resetting, make sure you have any required ISP information, particularly PPPoE credentials or static IP details, as after the reset, the TP-Link router will need to be configured again from the beginning.

Reset Using the Physical Button

The quickest way to factory reset your TP-Link router is by using the Physical Reset button. Here is how you can do it:

  1. At the back of your router, identify the reset button. Depending on your model, you may have a dedicated Reset button, a combined WPS/Reset button (pressing for less than five seconds activates WPS; pressing for 10 or more seconds triggers a reset), or a pinhole reset button requiring a pin or paperclip to press.
  2. Press and hold the button for more than 10 seconds. Release when the router’s light starts to blink.
  3. Now, wait for the router to reboot. The router will reboot and return to factory default settings.

Reset via the Web Interface

Alternatively, you can reboot your TP-Link router through the router’s admin panel. Here is how to do it:

  1. Log in to your router by heading over to tplinkwifi.net or 192.168.0.1.
  2. Once logged in, go to Advanced > System/System Tools > Backup and Restore.
  3. Click on Factory Restore and wait for the router to reboot.
  4. After reboot, the router will be reset to factory defaults, and all previously connected devices will be disconnected.